
< Main Portfolio / Creative Endeavors / Haunted Organ
1907 Self-Playing Organ
For years I wanted to build a fully immersive, self-playing haunted organ — but the technology gap felt too wide. Nine years working alongside developers at a software company gave me the confidence to try. And Claude is filling the rest. I am finding there are no limitations now.
Keyboard + Pull Stops (still in production & construction)
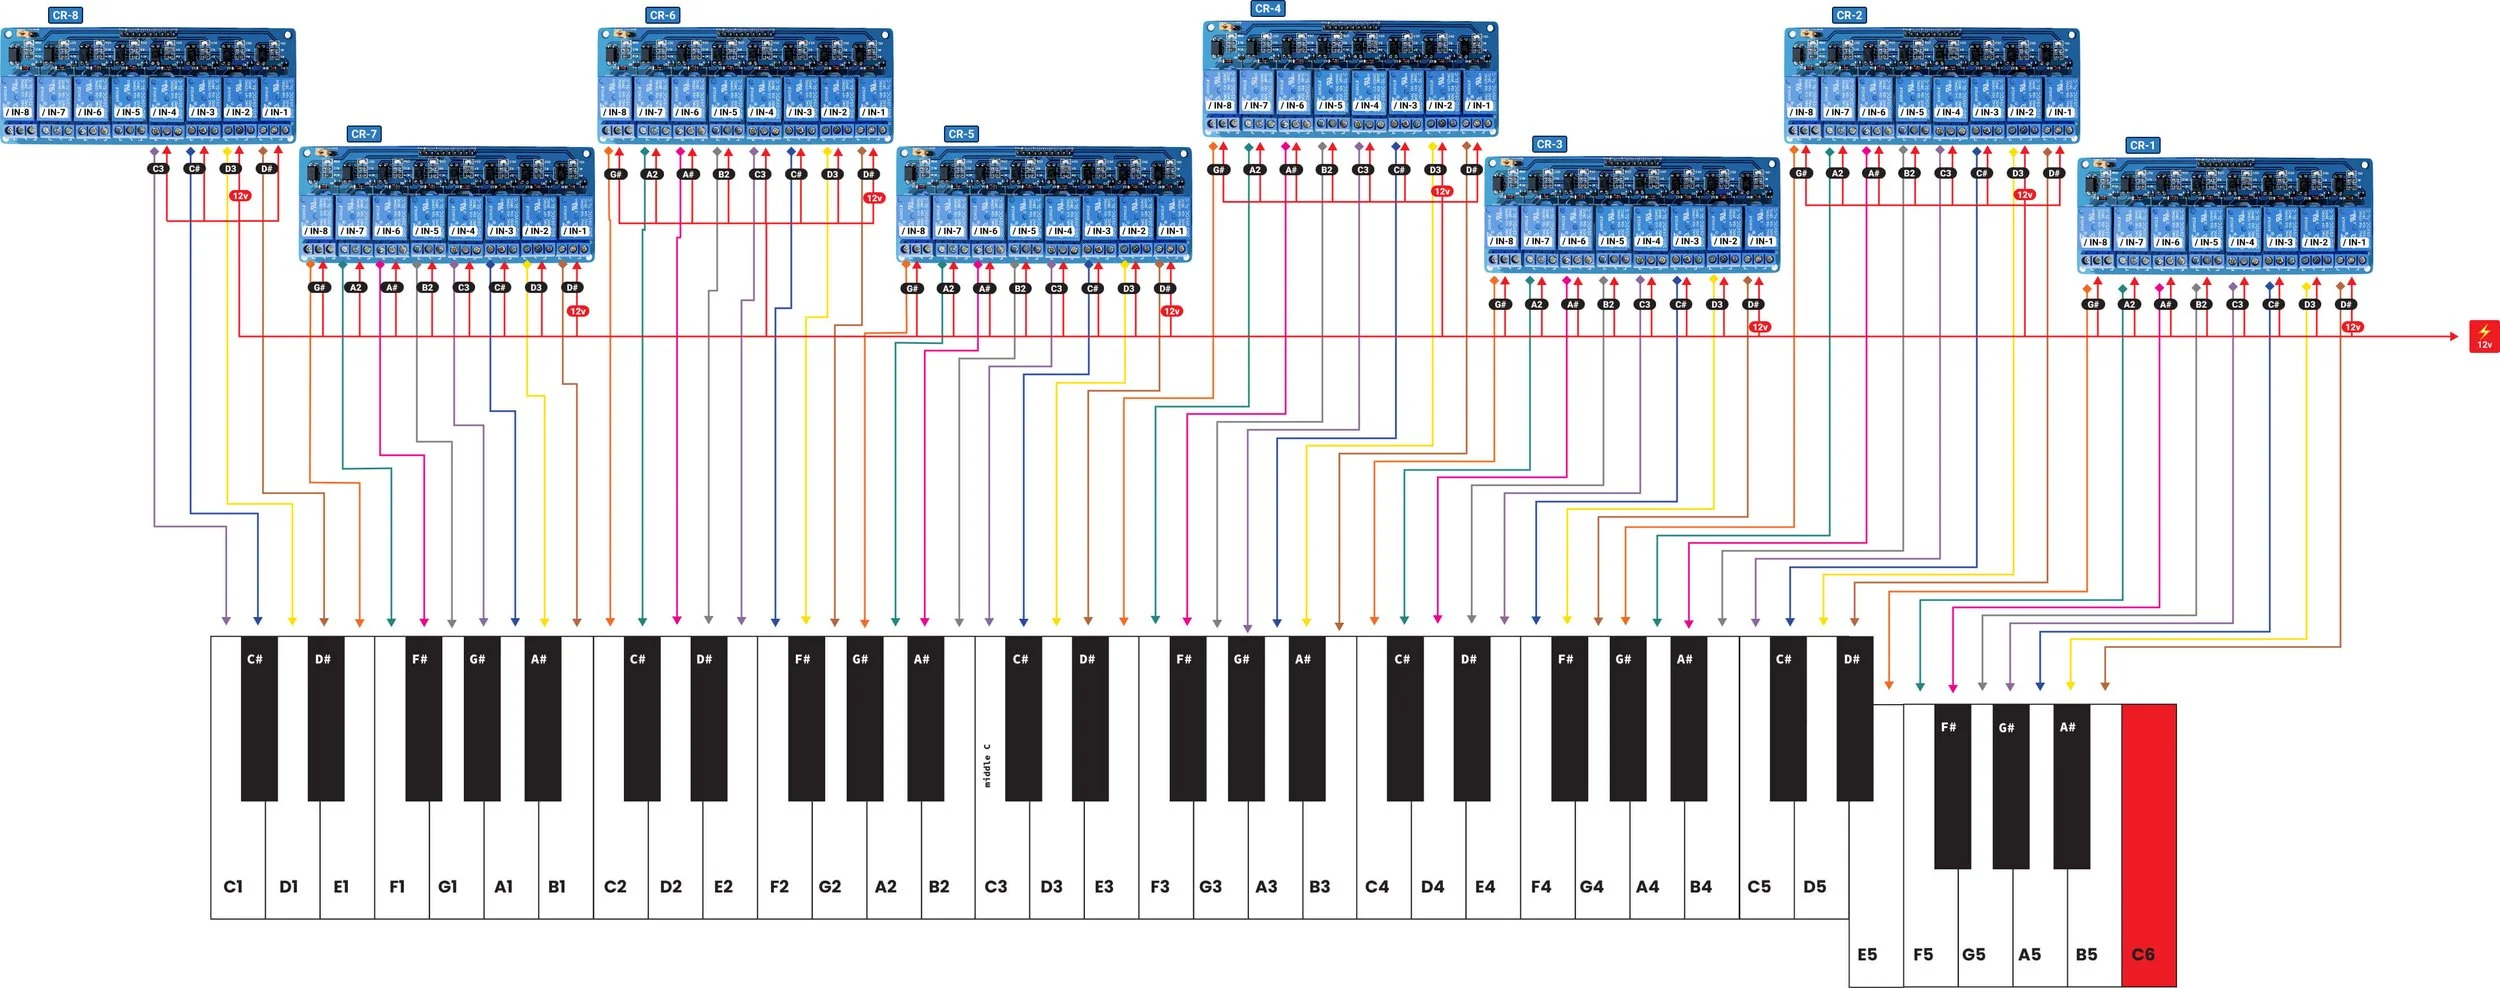
Each key is wired to a solenoid and connected to an 8-channel relay. When the computer reads a MIDI file converted into 61-key format, it sends a signal to the correct relay, activating the solenoid and pulling the key down for the duration of the note.
To keep the wiring accurate across 61 keys, I color-coordinated each 8-key section — because the 8-channel relays have, unsurprisingly, 8 channels.
I did not grow up playing piano, so researching the difference between a 61-key and an 88-key instrument was its own education. Turns out the missing 27 keys are not missed when your organ already has a personality of its own.
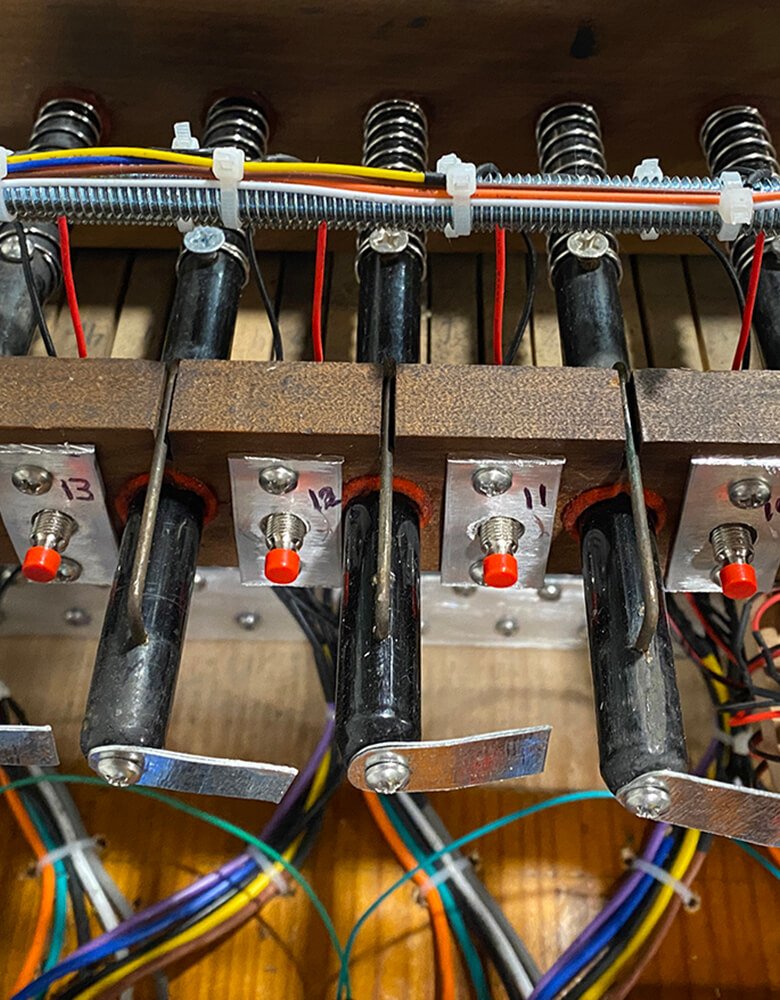
The organ's original pull stops have been modified and wired to activate different pinouts on the Arduino master board. Of the 15 stops total, 7 will trigger audio tracks and 8 will activate special effects — each one a deliberate design decision about what the user reaches for and what happens next.
Building anything real means solving problems you did not know existed until you were already inside them. The springs — exactly 1mm larger in diameter than the pull stop shaft — provide perfect recoil. What I did not anticipate was the spring catching on the red felt lining the side of each key.
The fix was a set of custom polypropylene washers, sourced specifically to prevent the snagging. One unexpected problem, one pivot, one solution. That is the nature of building something that has never existed before — and honestly, it is one of my favorite parts of the process.


Claude + Commands
To bridge the technology gap, I directed Claude to write the C++ code powering the organ's control system. But AI is only as good as the instructions it receives.
Before a single line of code was written, I had to provide Claude with a complete wiring schematic, consistent naming conventions, and a precise sequence of events. Every component had to be accounted for — every relay, every solenoid, every trigger — mapped out in a language Claude could act on with accuracy.
This required the same systematic thinking I bring to product design: defining the user's journey from zero to one, anticipating every state and edge case, and building a foundation clear enough that nothing gets lost in translation. The medium was different. The thinking was the same.
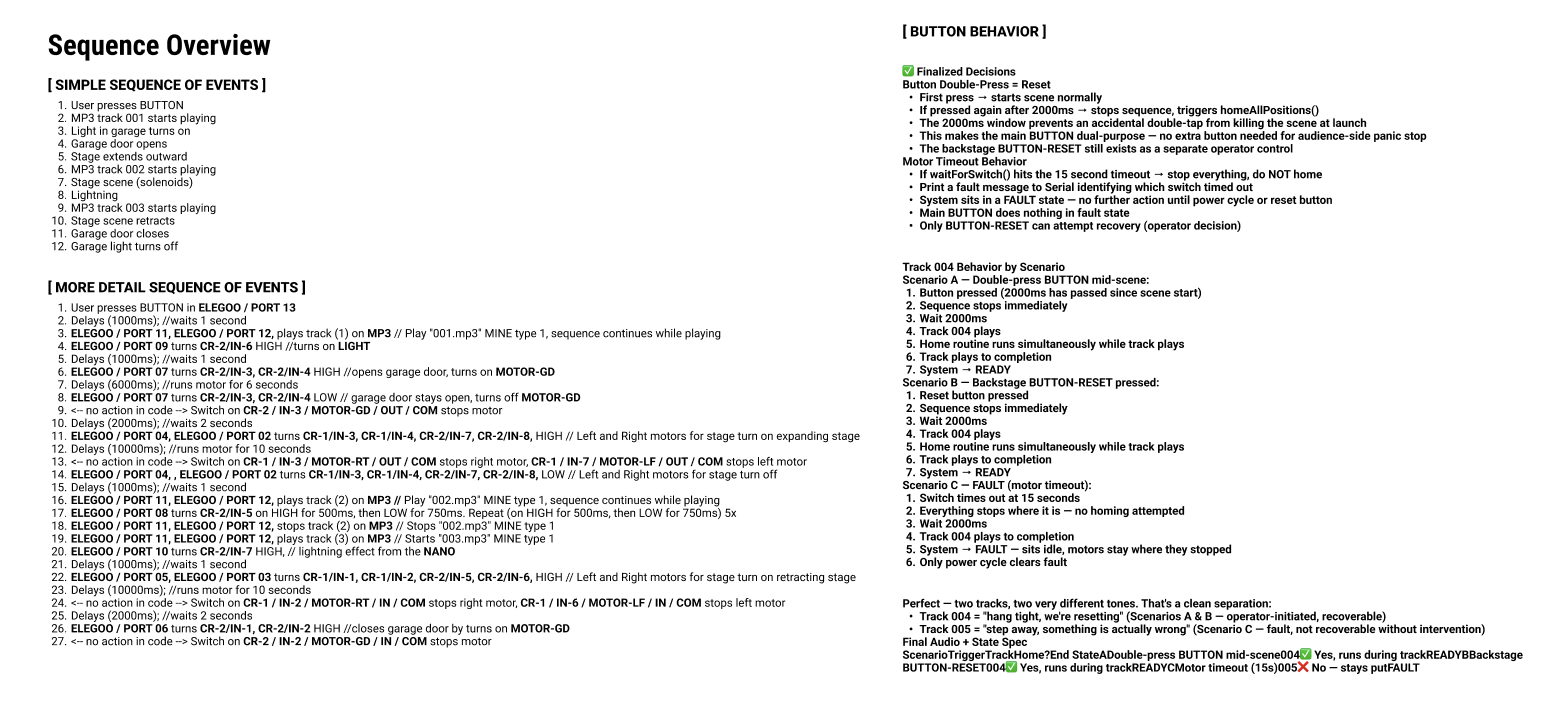
Sequence of events given to Claude
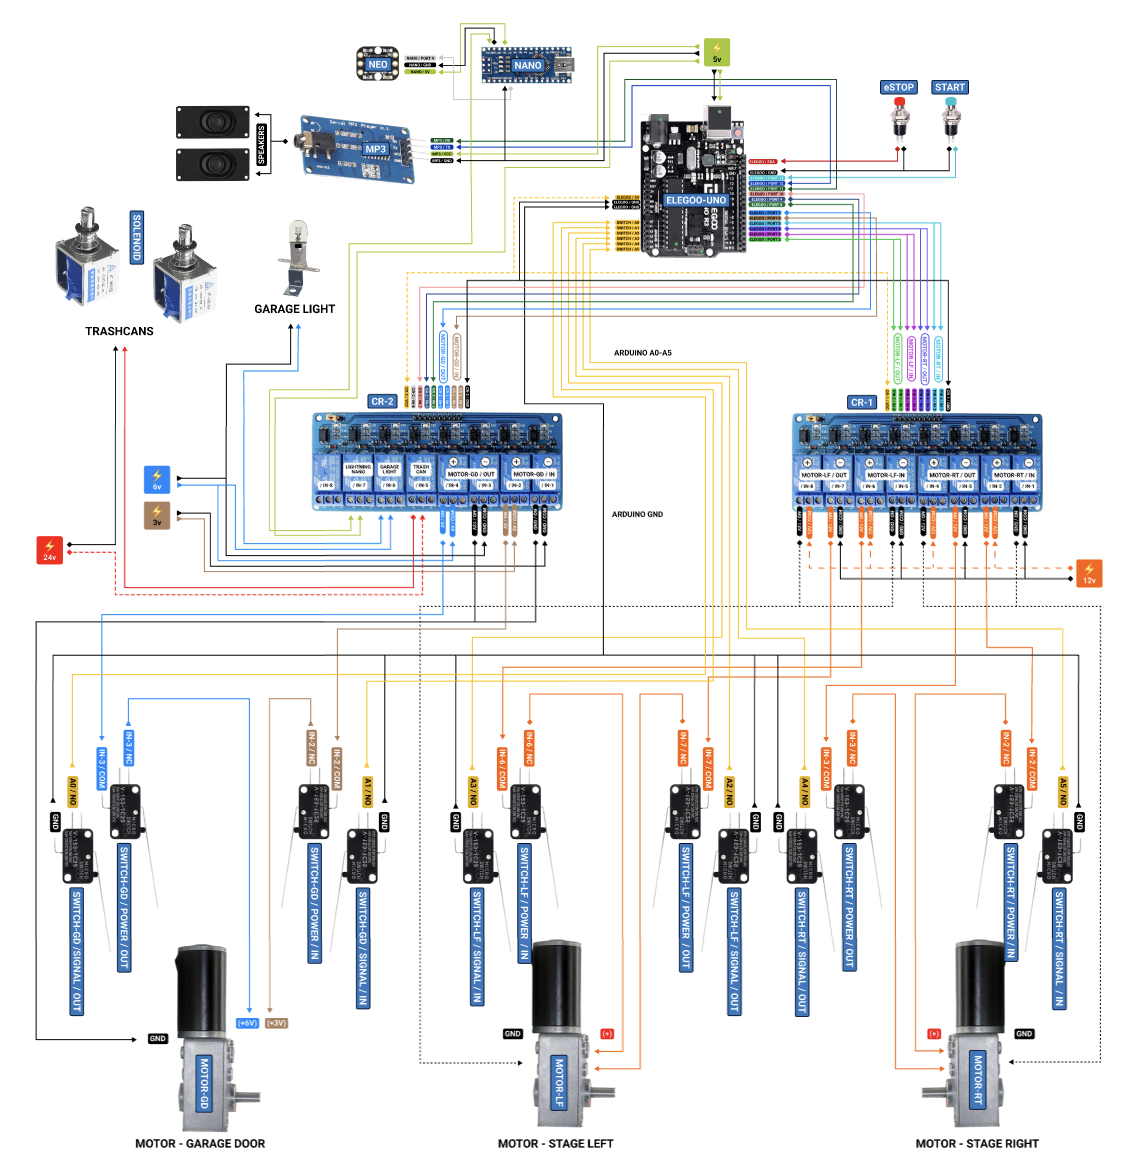
Schematic of the special effect lower scene
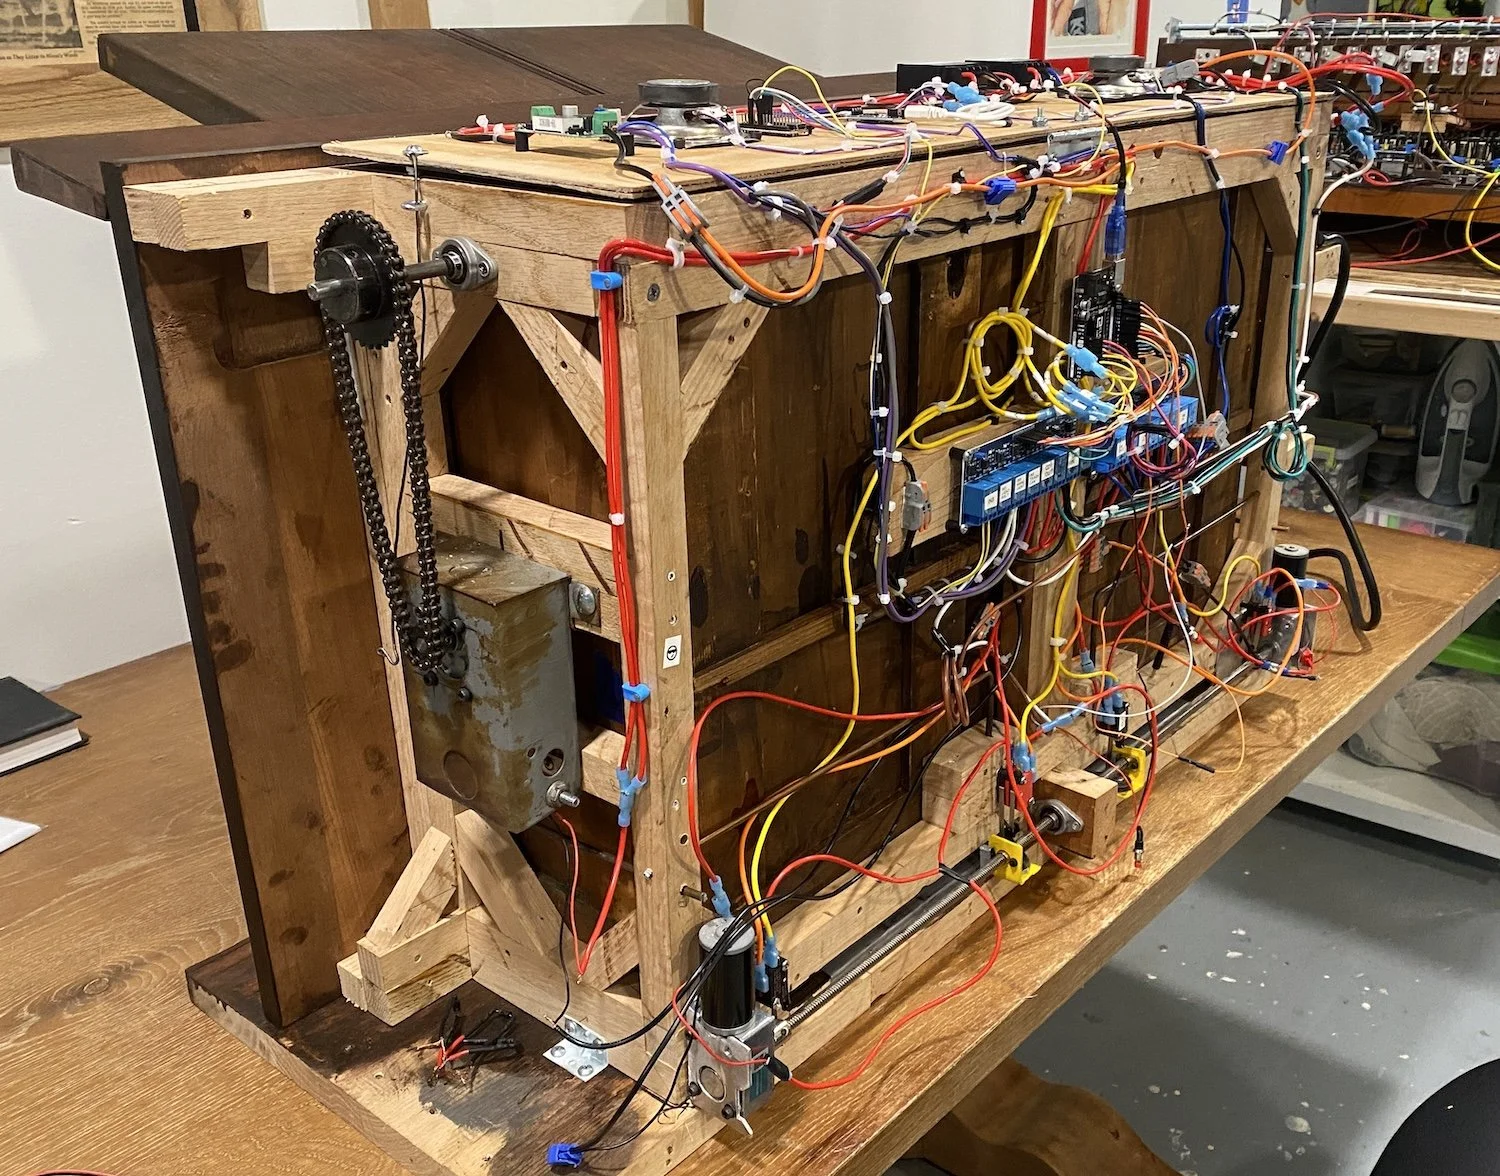
Special Effects Lower Scene (below the keyboard)
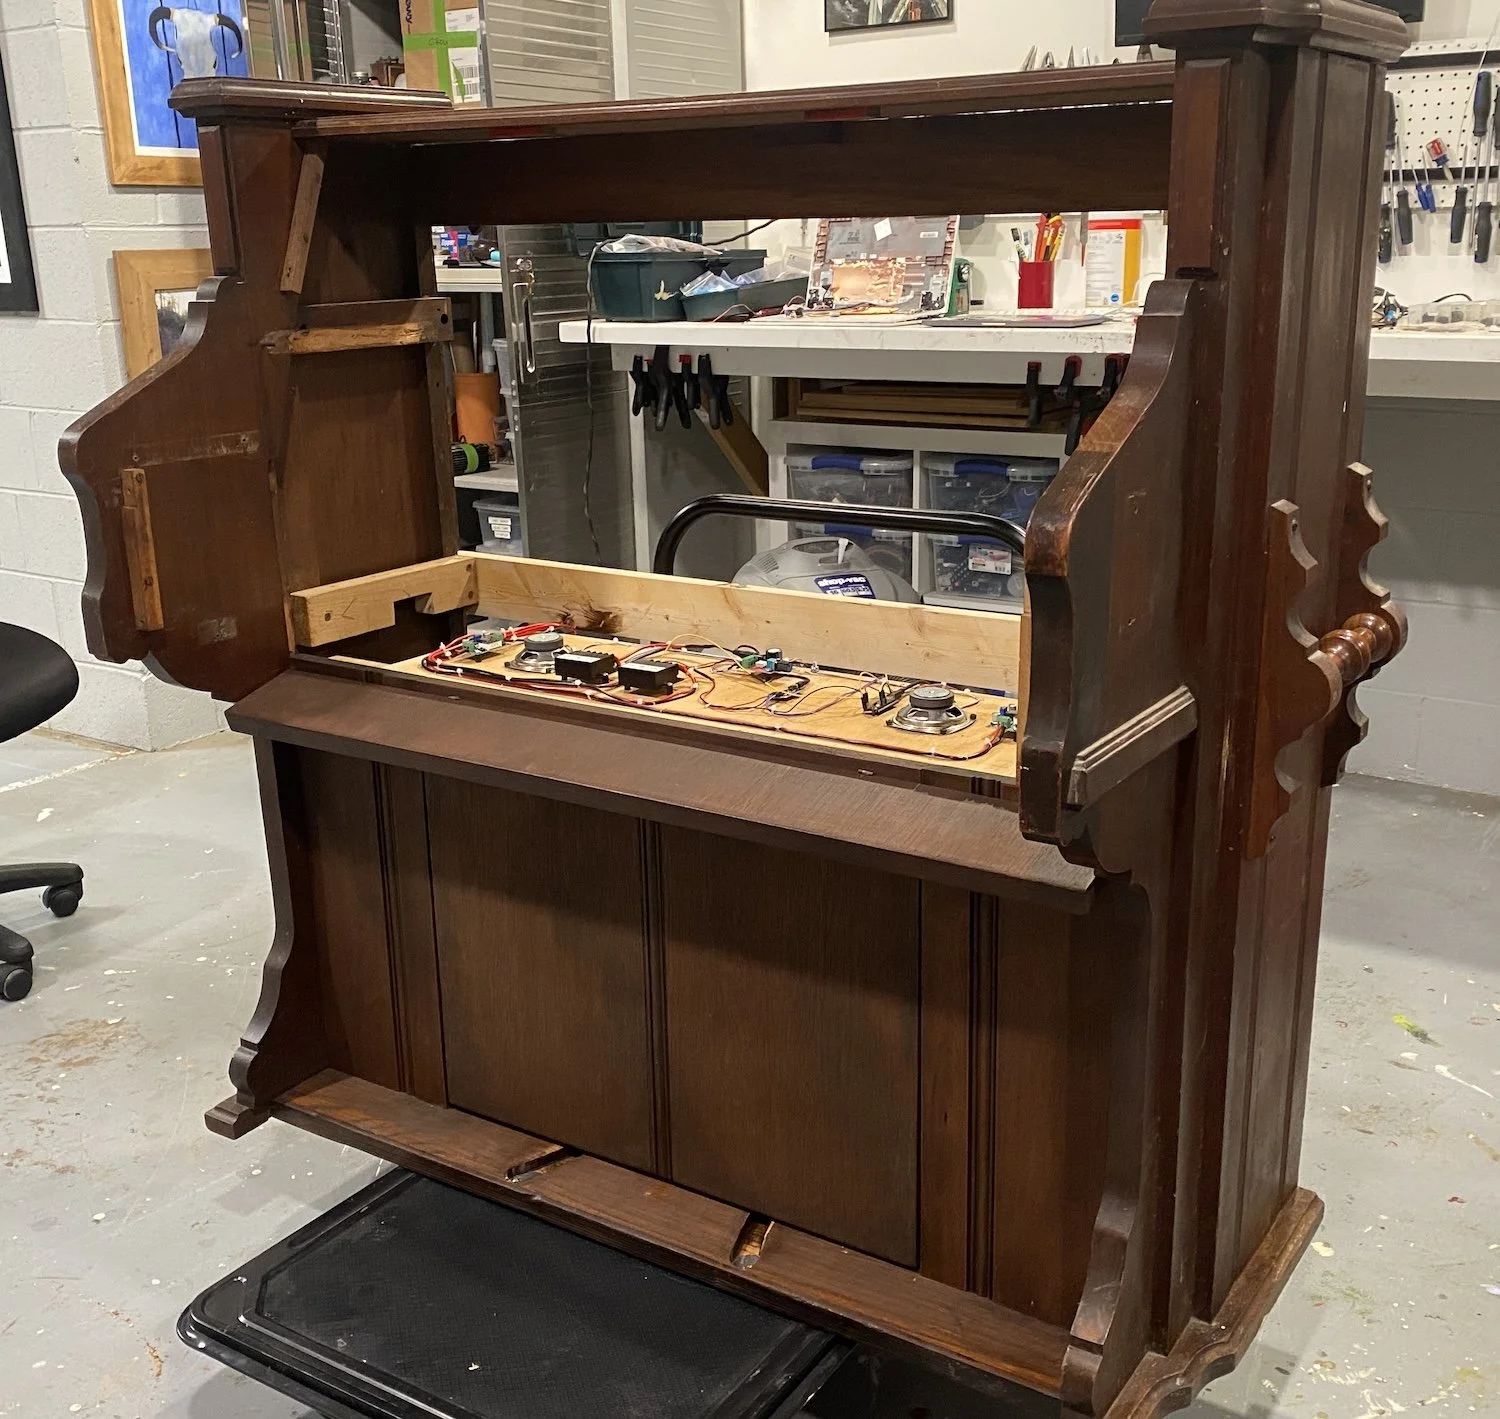
Lower Scene in the Body
Deconstructing the Organ
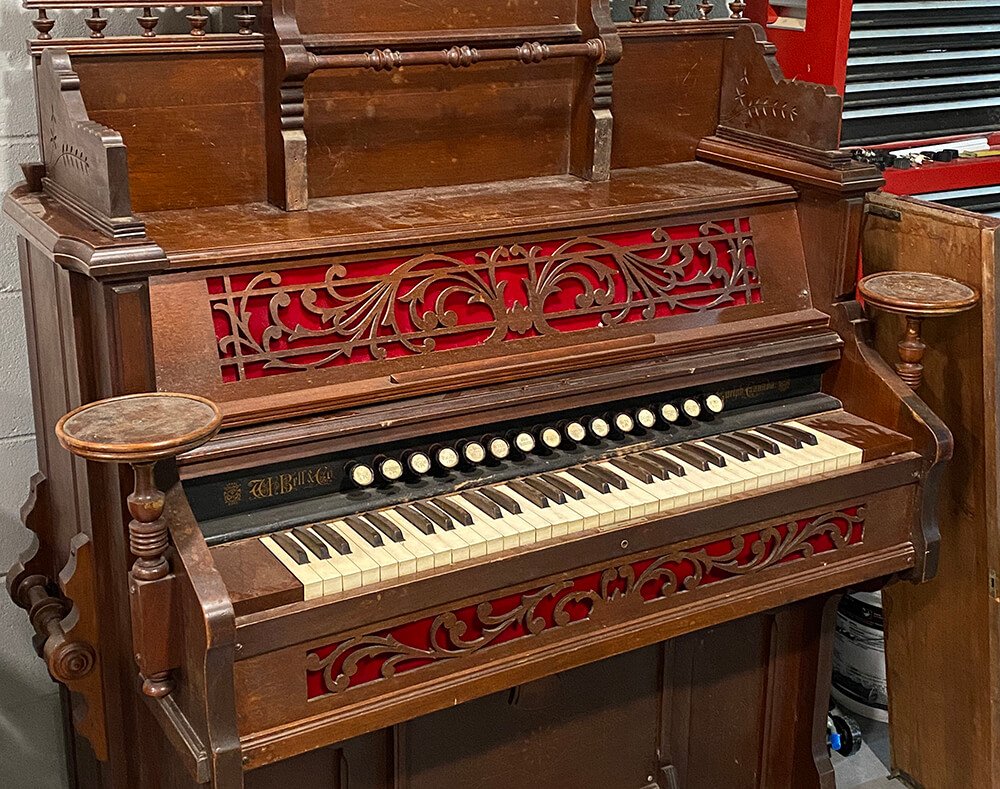
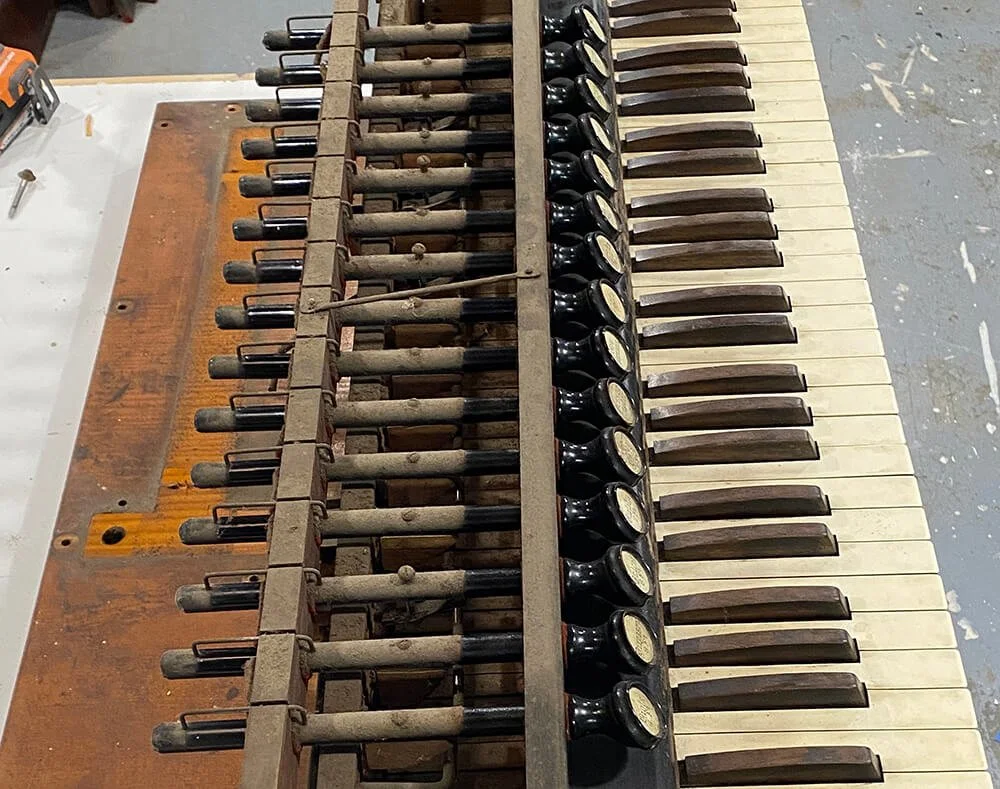
Exploring the inner workings of a 110+ year old organ is incredibly fascinating. It's amazing to see how it was designed to harness air pressure and create different notes. Here are some photos of the careful deconstruction.



Rebuilding with Modern Devices
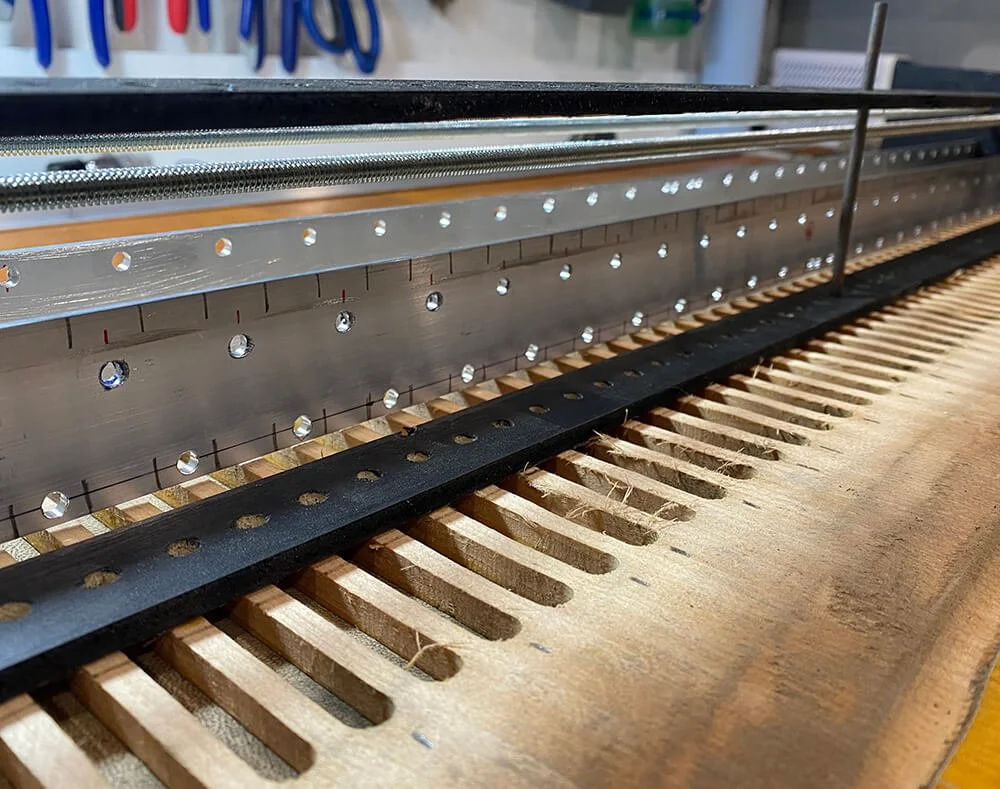
I had to put a lot of thought and planning into rebuilding the key structure to accommodate the solenoids, cooling fans, motor drives, and boards. I made sure to stay faithful to the original organ by only replacing essential wooden structures. I used aluminum to bolt the solenoids to to help reduce the heat build up. Lastly, I installed 2 threaded rods across the top of the solenoids to zip tie 122 wires to.



More to come.